
How to Declutter a Storage Unit (Especially When It’s Filled With a Parent’s Belongings): Katherine’s Story & A Step-by-Step Guide
Whether your storage unit is full of items from a parent who has passed away, or it’s filled with your own belongings you’ve been avoiding for years, opening that door can feel overwhelming.
Storage units are supposed to be temporary, but many people end up paying for them for years because the thought of facing what’s inside feels too hard.
This post shares:
- The second half of Katherine’s story (name changed for privacy), sorting four full units of her mother’s belongings {read the first post here if you missed part 1}
- A detailed, practical process you can use to declutter any storage unit
- Tips for deciding what to keep, donate, sell, or let go
Whether you’re clearing an estate or trying to save money by eliminating storage fees, this guide will help you get started with clarity and confidence.
Katherine’s Storage Unit Situation: A Perfect Storm
After her mother passed away and the house sold quickly, everything was packed into:
- Three indoor storage units (10’x15′, 10’x18′, and a 12’x30′ double-door unit)
- One outdoor unit (about 10’x18′)
Every unit was packed floor to ceiling with:
- Boxes with vague labels
- Piles of furniture
- Sentimental items
- Business supplies
- Unopened purchases
- Craft materials
- Inherited belongings
- Paperwork
- Items intended for future use
- Mixed household items
- Some things that should have gone straight to the garbage
This mixture is very typical in storage units, whether they belong to a parent or to you.
Tip: Most storage units contain a real mix of items. Sorting and grouping items will help you decide what to keep and what to let go of.
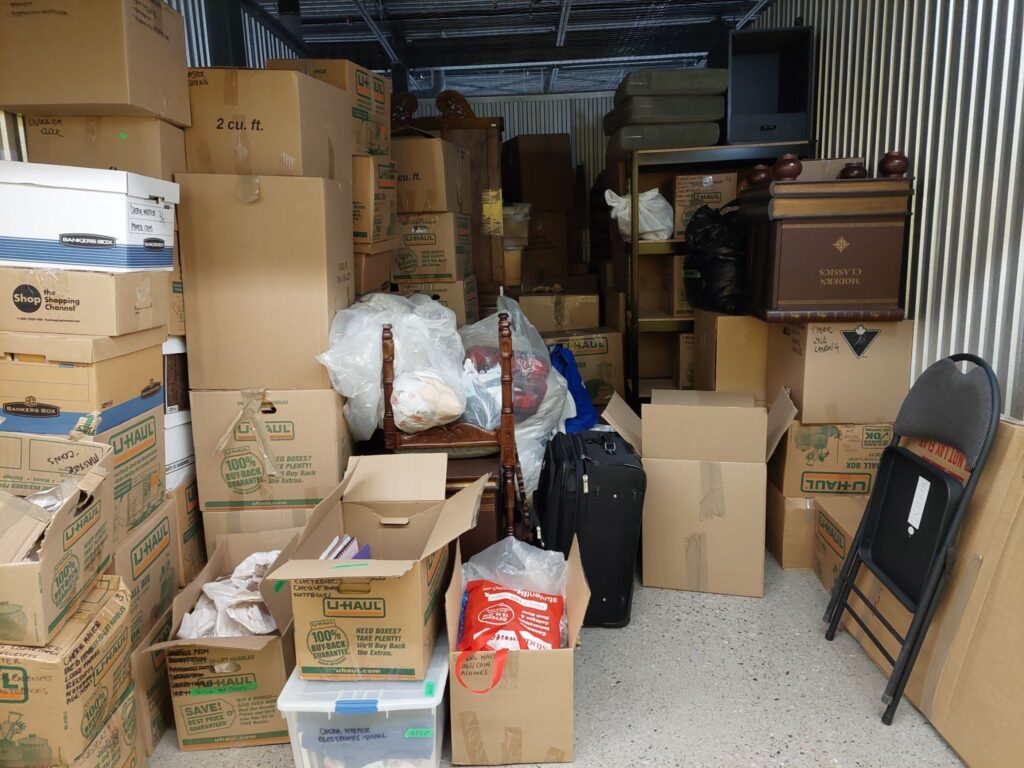
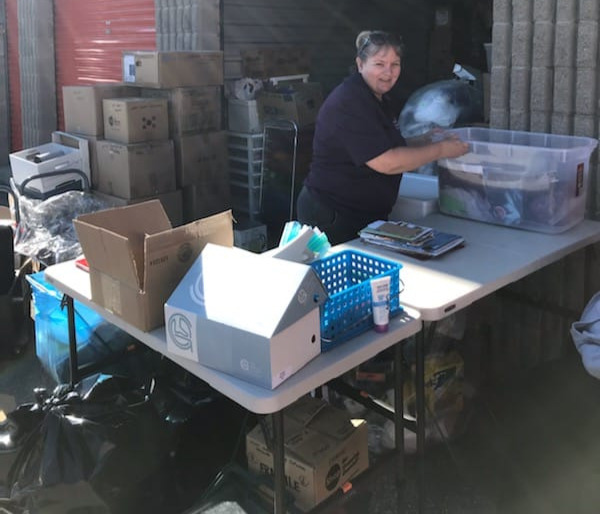
Part way through sorting the largest unit
The Sorting System We Used (And You Can Copy!)
To make the process manageable, we used a highly efficient sorting system that works beautifully for any storage unit we help declutter.
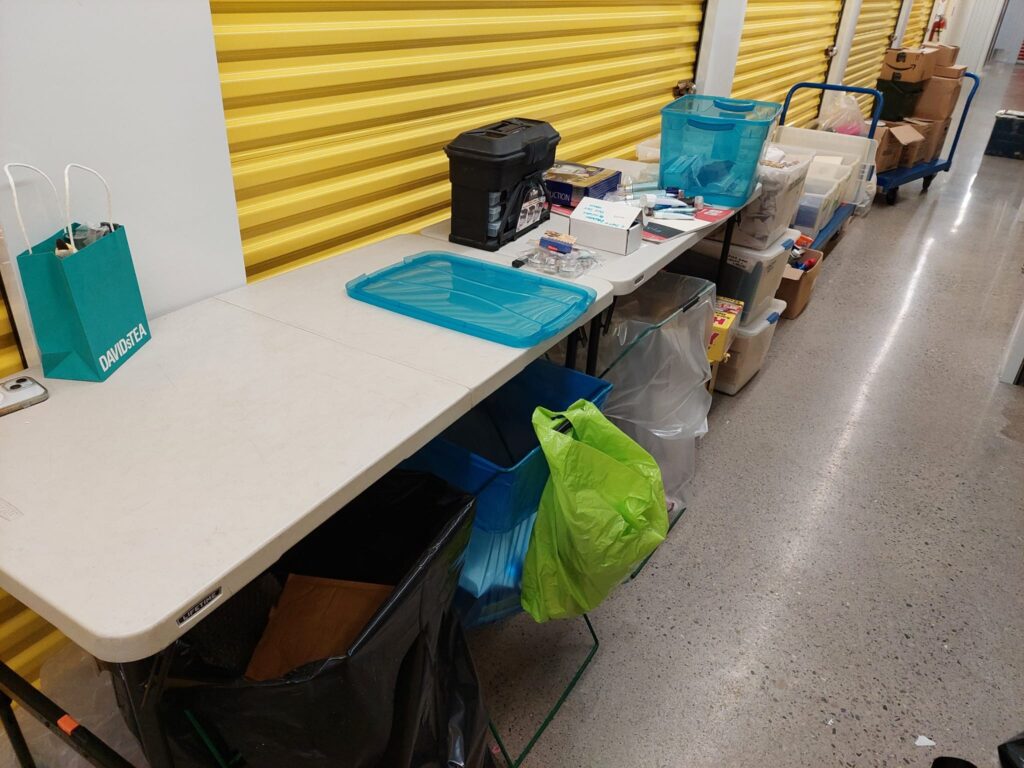
Our Setup Included:
- Folding tables
- Garbage bags
- Recycling bags
- Shredding box
- Donation bins/bags/boxes (general + specialty)
- Hazardous waste container
- Electronics recycling box
- Bins for sentimental items
- A “keep” area
- A staging zone for items to sell
We created an “assembly line” so Katherine could make decisions while we handled the physical work.
Tip: The right setup matters. A good system reduces stress and prevents re-cluttering.
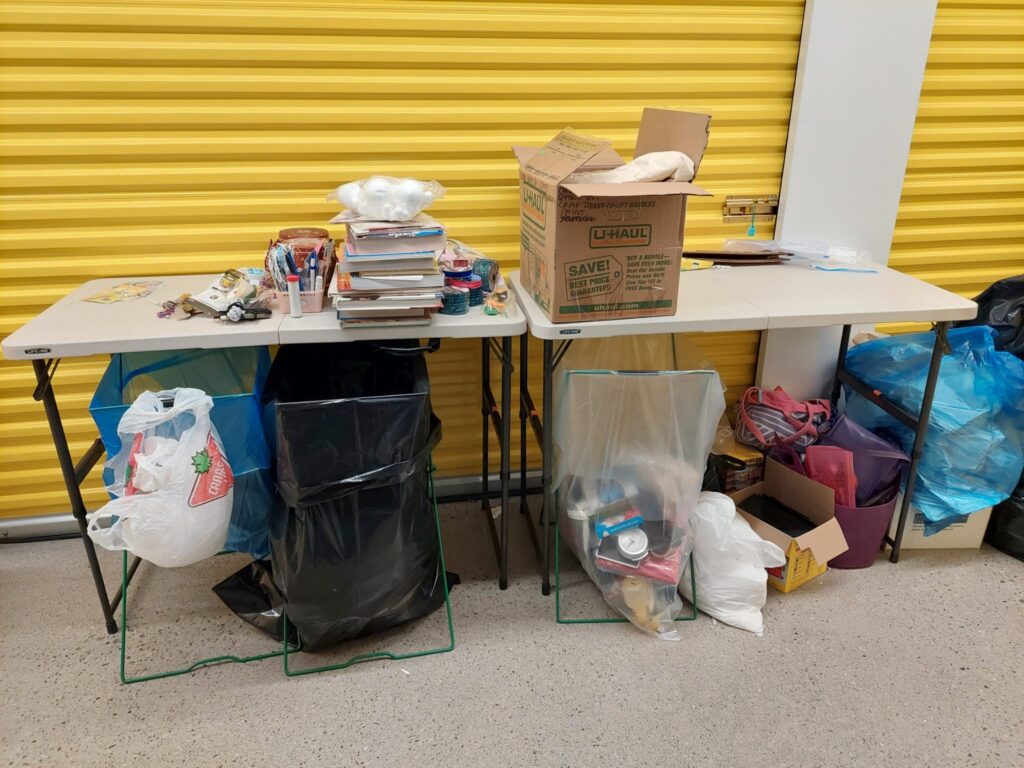
Our set-up to declutter and sort items in the storage unit
Where to Start When Everything Is Overwhelming
We began with the smallest indoor unit, not the biggest, because:
- It contained the most straightforward items
- Clearing it quickly created momentum
- It provided a staging area for selling/keeping items
- It was less emotionally heavy
Tip: Start with the easiest unit or the easiest corner of the unit. You need quick wins.
Selling vs. Donating: Making a Smart Decision
Selling items when you’re decluttering after someone passes away is ideal in theory, but not always ideal in practice.
Katherine considered doing an online auction because there were so many great items in the storage units, but she quickly realized that due to the density of the items in the units:
- There wasn’t room to photograph furniture and store items in lots
- Online auction pickups would be complicated
- The storage facility had rules about pickups
- She wanted to see progress and storing items for a future auction would reduce her motivation to continue making decisions
- Renting more space would reduce profits
Ultimately, she chose to donate most of the items in the storage units.
Tip: Selling takes space, time, organization, and energy. Only attempt it if it simplifies your life instead of complicating it.
Huge Milestone: Closing the Largest Storage Unit
After we helped Katherine clear the smallest unit, we focused on decluttering the largest one, since it was the most expensive one. As we cleared space, we consolidated items into the small and medium indoor units and Katherine was able to give up her largest, most expensive unit.
This is one of the most satisfying moments when decluttering storage units!
Tip: Your first major goal should be to reduce the number of units (or size of unit).
Sorting the Slower Categories
Once most general belongings were cleared and we emptied the medium unit (another milestone!), we were left with only the small unit. We had moved all the shelves to this unit and grouped the remaining boxes by category. At this point Katherine faced the time-consuming categories that are common in both estate and personal storage units:
- Paperwork
- Photos
- Collections (coins, stamps, memorabilia)
- Sentimental items
We had moved these boxes and bins to the smallest unit as we sorted through the other 2 units, so we could make quicker progress.
Katherine’s process involved:
- 20+ boxes of paperwork sorted & reduced
- 12 bins of Christmas decorations condensed to a few bins
- Multiple passes through sentimental items
- Identifying and keeping meaningful heirlooms
- Letting go of most “just in case” items
Tip: Expect that paperwork and sentimental items will take longer. Schedule shorter sessions and take breaks.
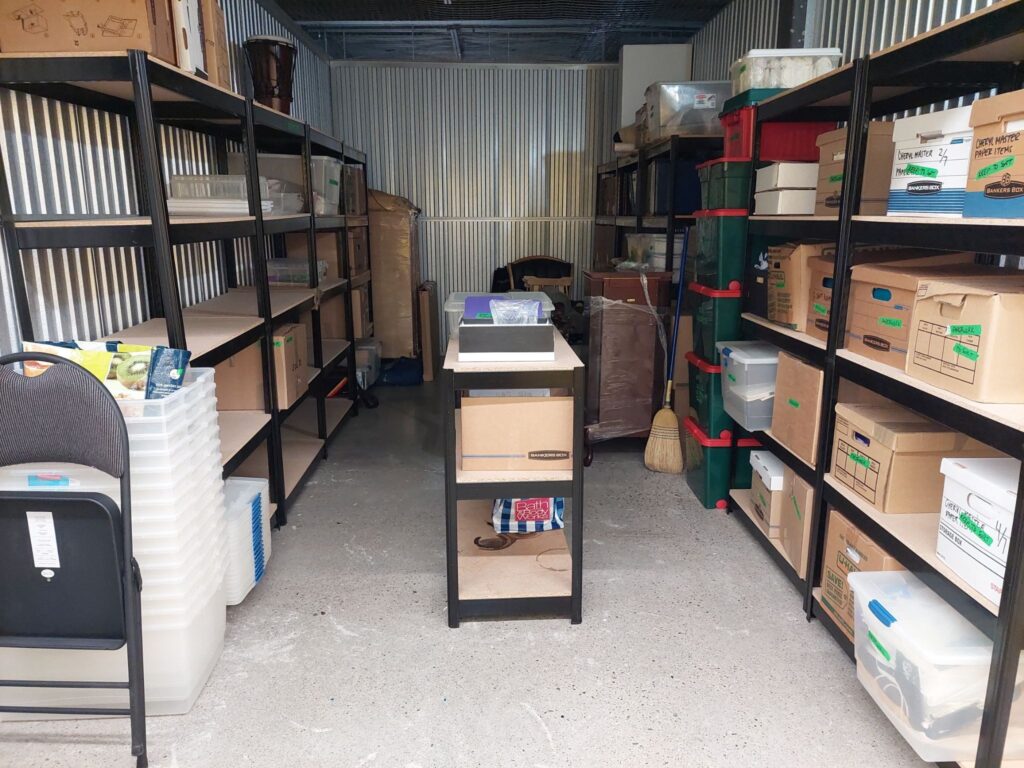
Remaining boxes in storage unit grouped by category on shelves
Take a second pass if you find you’re keeping too much
Over time, Katherine realized she was keeping more “just in case” items and sentimental things than she truly needed, wanted, or had space for.
We helped her sort sentimental items into three categories:
- Items meaningful to her mom
- Items meaningful to other relatives (grandparents, etc.)
- Items meaningful to her own childhood
Out of thousands of items, she ended up with just one bin for each category.
Tip: You don’t have to keep something just because it was sentimental to your parent. Keep what is meaningful to you.
Finishing the Outdoor Unit
Once the 3 indoor units were sorted, we moved to the outdoor unit. Working outside made sorting easier, until the weather changed! Once we’d sorted a lot of the boxes outside, the weather began to get colder, so we moved the remaining boxes indoors to the smallest unit and continued sorting there.
Tip: If weather is unpredictable, sort boxes in small batches and bring them indoors if possible.
Sorting items at the outdoor storage unit
The Final Result: A Fresh Start
After a year of steady, manageable sessions, Katherine:
- Reduced from 4 units to none
- Stopped paying thousands of dollars in monthly fees
- Identified the sentimental items she truly wanted
- Moved into an apartment that fit her needs
- Organized the remaining items beautifully
- Experienced enormous emotional relief
Once she reduced everything down to about 20 boxes/bins, Katherine moved into a larger apartment with:
- A storage locker
- A den that could be used for organized storage
- Enough room for the few furniture pieces she wanted
This move wasn’t possible while she was paying storage fees, and had so many boxes and bins.
We helped her unpack, organize, and set up her new space—and finally clear out the last storage unit.
After over a year of consistent effort, she had zero storage fees and a home that fit her life.
How to Declutter Your Own Storage Unit
This section is helpful for anyone, whether your storage unit holds a parent’s estate or your own long-neglected items.
1. Choose a target: reduce the unit size OR eliminate a unit
Clarity creates motivation.
2. Bring the right supplies
At minimum:
- Gloves
- Garbage & recycling bags
- Donation boxes
- Labels
- Tape
- Utility knife
3. Start with the easiest items
Always begin with:
- Trash
- Broken items
- Empty boxes
- Obvious recycling
Then move to:
- Larger items that will create space
- Duplicates
- Unfinished projects
- Items you forgot about
This builds momentum.
4. Create your sorting zones
- Keep
- Donate
- Garbage
- Recycling
- Sell
- Shred
- Hazardous waste
- Electronics recycling
- Sentimental
- “Not sure yet” (but review at the end)
5. Take items out in layers
Don’t empty the whole unit at once. Work row by row or section by section. You may need to move some things out of your way initially, but generally try to only take out what you’re sorting so that you don’t have to put too much back in at the end.
6. Decide whether selling is realistic
If you don’t have:
- Time
- Space
- Energy
- A way to coordinate pickups
- Lots of valuable items
…then donating may be a more efficient option.
7. Consolidate as you go
Aim to group boxes by category so that:
- You can see how much you have
- It’s easier to make decisions
- You can eventually move everything into a smaller unit or your home in an organized way
8. Make a plan for sentimental items
Choose:
- How much you want to keep
- How you’ll store it
- What truly matters
9. Celebrate milestones
- Finishing one corner
- Clearing one shelf
- Emptying one box
- Eliminating one unit
These all matter!
10. Be strategic about when you work
Schedule your decluttering sessions strategically. Avoid weekends, month-end, and busy times at the facility. Otherwise, you may have to move your hallway setup if people need to get by you, you’ll spend more time waiting for elevators or places to load your vehicle, and there may not be carts available for you to use.
Also, when you set up in the hallway, you’ll likely be blocking other units. Try to ensure that you can easily move things if someone needs access to their unit by using carts, boxes and bins. In all the storage units I’ve worked in, we rarely need to move for someone, but when we do, they’re usually much happier if we can shift things quickly.
Tables and carts in storage unit hallway
Should You Hire Help for a Storage Unit Clean-Out?
Even though paying for organizing services may seem counterintuitive, if you’re paying expensive storage fees and aren’t able to do the work yourself, it’s worth the expense to help get you to a point where you no longer have to pay those storage fees.
Professional organizers can:
- Handle the heavy lifting
- Sort quickly
- Keep you emotionally supported
- Coordinate donations
- Help you make decisions without guilt
- Speed up the process dramatically
If your project feels too big, this support can make all the difference.
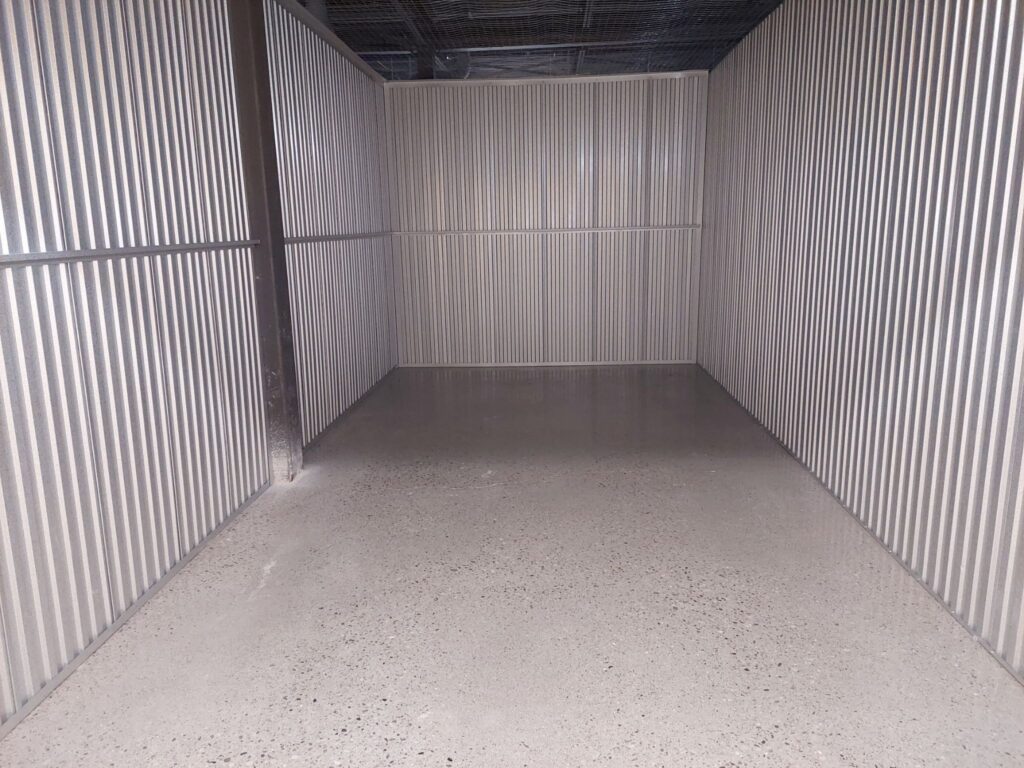
An empty storage unit is a beautiful site!
Decluttering a storage unit—whether it’s filled with a parent’s belongings or your own can be incredibly emotional. But you are not alone.
With the right system, support, and mindset, you can gain clarity, reduce costs, and finally reclaim your peace of mind.
If you need help decluttering or organizing, contact me for in-person organizing services in the Mississauga area, or virtual organizing services anywhere else. Happy organizing!

I am a professional organizer and author, ready to help you declutter and organize the overwhelming areas in your home and develop systems that will work with your family’s lifestyle to help keep you organized!
